Last-minute production of cards to swap at the CTMH Convention is now in progress!! I’m making 30 of these birthday swing cards, so why didn’t I choose a much simpler and less time-consuming design?!! 😂 I’ll never learn, lol. It’s crunch time baby and I have lots of coloring to do! I still have laundry and packing to do also, and I’m bound and determined to be ready to leave early tomorrow morning. Let’s do this!! ❤️ #ctmh #ctmhconv2019 #celebrate #makeitfromyourheart #ctmhleader #ctmhthincuts #swingcard #ctmhsharethejoy #ctmhtruelove #utahprovobound #stampwithjencreativefriends
Showing posts with label Convention. Show all posts
Tuesday, July 9, 2019
Thursday, September 13, 2018
Oh What Fun - Extravaganza Presentation and Artwork!
First, I'd like to say THANK YOU to Close to my Heart
for the amazing opportunity I was given to present my
artwork on stage this Summer at the annual Convention
for CTMH consultants! It meant so much to me to be invited
and it an was absolute honor and thrilling experience.
I first had to sign a confidentiality agreement with CTMH, because I would be receiving so many brand-new products more than a month prior to Convention, and it was very important that I keep secret all of the new products I would be getting, so that the first big "reveals" could happen on stage, only at Convention.
My big box of "top secret" Close to my Heart products arrived on Wednesday, May 23rd. You can see here how very happy and excited I was on this day...and this was
BEFORE I had any clue what might be inside or how generous CTMH would be in
giving me so much fun stuff to play with!
BEFORE I had any clue what might be inside or how generous CTMH would be in
giving me so much fun stuff to play with!
I can now reveal what I received in that box...
it included the most colorful and FUN
Christmas-themed papers, ink pads, stamp
sets, thin cuts, and embellishments ever!
I was instantly grateful that I would get to
design CHRISTMAS artwork! I love Christmas!!
However, as I began to make cards and scrapbook pages,
I struggled with the fact that pink isn't really one of my
favorite colors to work with, and I began to find it
a little bit challenging to use for Christmas.
favorite colors to work with, and I began to find it
a little bit challenging to use for Christmas.
It took a few tries, but eventually, I began to get over that
silly little voice in my head that said, "You can't do pink
with Christmas!" Once I opened my mind to the possibilities
and began thinking, "Why not?" I really began to see the
true beauty of these products and my creativity just flowed.
I spent the next few weeks creating with all of the
NEW products I had received, and then...
the big day (Friday, June 29th) arrived!
Here are a few of the photos I took that day, as well as,
all of my artwork made with the new OH WHAT FUN
paper collection (only from Close to my Heart!)
Here is your first peek at just one of the five
NEW paper collections that are now available
for customers to purchase since
September 1st! Enjoy!!
My top-secret artwork is all packed in my trunk and I'm ready to go present it!
Here is the main stage where I delivered my Extravaganza Artwork Presentation!
Ink pad colors used include NEW Clover, NEW Mint, Pixie, Raspberry, and Sweet Leaf.
Standard-size cards made with our NEW watercolor pencils (Z4242), NEW Watercolor paper pad (Z4243), and water brush splatters. Stamp sets include NEW Feliz Navidad (B1620), NEW Making Spirits Bright (B1627), and the NEW Christmas Countdown (D1799) for the small tree. Ink pad colors used include NEW Mint, Lagoon, and Sweet Leaf.
Standard-size cards made with the NEW Mistletoe Wishes stamp set (G1168). Ink pad
colors used include NEW Clover, Pixie, Raspberry, and Archival Black.
Layout #1 featuring NEW Clover and NEW Mint cardstocks
with the OH WHAT FUN paper packet (X7238B) and complements (X7238C).
Layout #2 with the OH WHAT FUN paper packet (X7238B) and complements (X7238C).
Layout #3 with the OH WHAT FUN paper packet (X7238B).
Used only the shades of pink patterned papers (Pixie and Raspberry)
along with SUGARPLUM glitter paper (the NEW color of the year)!
Six standard-size cards created with the PML cards from the OH WHAT FUN
paper packet (X7238B), the coordinating FELT SHAPES (Z4228),
and the Christmas Countdown stamp set (D1799).
Single 12x12 page made with the OH WHAT FUN paper packet (X7238B)
and coordinating complements (X7238C).
Three standard-size cards featuring some of our NEW thin cuts...
Season's Greetings (Z4308), Merry Christmas (Z4306) and Falala (Z4307)
with SUGARPLUM glitter paper (Z4188).
Single 12x12 page made with the Raspberry Ombre patterned paper as
the base page, plus the You Have My Heart stamp set (D1796).
Floral pattern is stamped on the watercolor paper heart using
Lagoon ink, colored in with our NEW Watercolor Pencils (Z4242),
and then brushed lightly with water from the small round waterbrush.
Two standard-size cards featuring the You Have My Heart stamp set (D1796).
This paper packet also works fantastically to create Non-Christmas-themed artwork!
This standard-size card shows off our NEW Ranger RED TINSEL Embossing Powder (Z4251).
I used OH WHAT FUN papers and embellishments to dress up a
small LED table lamp that I purchased from Wal-mart for less than $5.
The branches were made by cutting half-way into 3" x 12" strips of
patterned paper with fringe scissors. I especially LOVE that cute little felt Santa!
Last of all, my favorite...the 12x12 framed home decor piece I created using
the Rainbow Striped patterned paper and NEW Chipboard Monogram Numbers!
Floral pieces cut using the Flower Market Cricut cartridge/collection.
Finally, here I am at the Consultant Creativity Showcase (above) displaying all of
my artwork that same evening after the on-stage presentation.
THANK YOU again Close to my Heart for the amazing privilege of presenting my creations
on stage alongside these other 0h-s0-talented consultant artists that inspire me!
(Left to Right):
Katy Taylor (https://scrappinkaty.blogspot.com/)
Andrea Sherman (https://girlpluspaper.blogspot.com/)
Carrie Simonds (https://misscarriesctmhcreations.wordpress.com/)
Lisa Stenz (http://lisascreativecorner.blogspot.com/)
Anna Jarnagin (http://annajarnagin.com/)
and (me!) Jen Rubio (http://jenrubio.blogspot.com/)
Wednesday, September 2, 2015
What is FUNdamental Scrapbooking?? (my Convention Presentation!! - Part 1)
So, back in May 2015,
the Close to my Heart home office
called and invited me to be a
"special presenter" at the annual
Close to my Heart Convention
(at the Disneyland Hotel, in Anaheim, CA)!
Of course I said "Yes!", so... I DID IT!!!
(as scary as it was to be up there, lol).
...and now that the NEW Annual Inspirations
and Holiday Expressions Catalogs have been released
online on September 1st (view catalogs here!!),
I can finally share ALL of the details about
what exactly it is that I shared on stage!!
Next, here is what I presented on stage
(along with the first two of eight total
scrapbook layouts that I shared that day):
What is a "Fundamental" Scrapbooker?
Fundamental scrapbookers like to create clean, uncluttered, and balanced pages that can be completed quickly and without a lot of fuss. We may not care to add any dimensional embellishments that make our pages lumpy/bumpy. We like our photos and journaling to be the main focal points on each page, without too many distracting decorative elements.
A Fundamental scrapbooker may be a beginner
that we are teaching to scrapbook for the very first time, OR...
It may be someone who is a very experienced
scrapbooker, like me, that wants to complete their pages
faster, simpler, and easier!
Even though I do like to take my time being extra creative sometimes, most of the time my busy life as a wife and working mother of five, just doesn't allow as much creative time as I want to have. If you, like me, have ever felt that you lack the time, lack the creativity, or lack the money to afford a lot of product, then Close to my Heart offers us a
simple solution...
simple solution...
FUNdamental Scrapbooking!!
using our new line of Paper Fundamentals and coordinating stickers/embellishments, as well as, our My Reflections paper packs and Complements!
Let me show you what my
"Fundamental" scrapbook pages look like...
(the new products I used are listed beneath each photo below)!!
NEW Paper Fundamentals - Basics (black) Z3128 (p.109)
NEW Fundamental Stickers Pack - Basics (with gold foil) Z3166 (p. 110)
"Piano Man" title is cut from NEW Gold Glitter Paper Z3076 (p. 145)
with the Cricut Artbooking cartridge Z3169 (p. 120)
"Jose Rubio Jr." is stamped with Alphabet stamp set, Jennifer's Hand B1484 (p. 107).
with the Cricut Artbooking cartridge Z3169 (p. 120)
"Jose Rubio Jr." is stamped with Alphabet stamp set, Jennifer's Hand B1484 (p. 107).
(close-up of the Left page)
(Close-up of the Right page)
Here's a tip on how to easily line up your sticker titles perfectly straight:
First, cut out just the word you want from your 6x12 sticker sheet.
Then, peel back and crease either the top half/bottom half of the sticker backing.
(it helps you to crease the backing more easily if you remove
the "negative" outside part of the stickers from the wax-paper backing also).
Then, lightly press to adhere just the sticky part of your sticker letters to your page wherever you want them. Last, pull away the wax-paper backing from underneath the rest of the stickers and press them in place. If you press them gently at first, then they are easy to remove (and re-adhere) wherever you prefer IF they do happen to move/slide around on you a bit. Now, they are instantly lined-up and spaced evenly and exactly how they came on the sticker sheet!
NEW Paper Fundamentals - Whimsy (crystal blue & sweet leaf) Z3127 (p.109)
NEW Fundamental Stickers Pack - Basics (with gold foil) Z3166 (p. 110)
ALL of my titles and black/white/grey elements are stickers from this pack!
(close-up of the Left page)(Close-up of the Right page)
Here's a tip on how to easily line up your sticker titles perfectly straight:
First, cut out just the word you want from your 6x12 sticker sheet.
Then, peel back and crease either the top half/bottom half of the sticker backing.
(it helps you to crease the backing more easily if you remove
the "negative" outside part of the stickers from the wax-paper backing also).
Then, lightly press to adhere just the sticky part of your sticker letters to your page wherever you want them. Last, pull away the wax-paper backing from underneath the rest of the stickers and press them in place. If you press them gently at first, then they are easy to remove (and re-adhere) wherever you prefer IF they do happen to move/slide around on you a bit. Now, they are instantly lined-up and spaced evenly and exactly how they came on the sticker sheet!
That's all for now!!
I'll be back to post Part 2 (two more layouts
that I presented on stage) very soon!! :)
I'll be back to post Part 2 (two more layouts
that I presented on stage) very soon!! :)
Wednesday, July 8, 2015
Disneyland hotel...Here I come!!
As of 5:30am on Wednesday morning, July 8th,
I am on my way to Disneyland (the happiest place on earth!)
for the annual Convention for Close to my Heart consultants!
These are the last few goodies on my table (above)
that are now packed and ready to go with me.
What an exciting week it's gonna be!!
Stay tuned...I'll update you all again soon
via Instagram (JenRubio5)
and Facebook (Jennifer Sluder Rubio)
...so please follow me :)
via Instagram (JenRubio5)
and Facebook (Jennifer Sluder Rubio)
...so please follow me :)
Wednesday, April 15, 2015
A-M-A-Z-I-N-G News!!! (and the April 18th Card Class!)
I'm so CRAZY thrilled
that I just can't contain my excitement any longer...
Close to my Heart corporate called me (yes, me!!)
this week to ask if I would take on a special assignment to
"Create for Convention" using all-new products for 2015-16!
Of course, I said "YES!!"
***
Of course, I said "YES!!"
***
The job requires that I sign a "confidentiality agreement"
since I will be using "top-secret" new CTMH products. I will be keeping all of my artwork and the new product I'm using under wraps until it can be unveiled at the annual Convention for consultants (held July 9-11, 2015
at the Disneyland Hotel in Anaheim, California)!
I am just BURSTING with joy
about this opportunity!!
THANK YOU CTMH for noticing me and my love for sharing creativity
...I am so THRILLED and READY for this!!
If you are a consultant on my team, there is still time to
register for Convention and join us in just 84 more days
at "the Happiest Place on Earth"
for three full days of creativity and fun!!
If you're not a consultant on my team, there's still time to
JOIN NOW and go with me for this magical event!
Enroll to be a consultant with me here:
http://stampwithjen.ctmh.com/ctmh/what-we-do/be-a-consultant.aspx
and/or call me with all of your questions about Convention and Consulting!
Lastly, these are the cards we're making
at the next Card Class
Saturday, April 18th
...I am so THRILLED and READY for this!!
If you are a consultant on my team, there is still time to
register for Convention and join us in just 84 more days
at "the Happiest Place on Earth"
for three full days of creativity and fun!!
If you're not a consultant on my team, there's still time to
JOIN NOW and go with me for this magical event!
Enroll to be a consultant with me here:
http://stampwithjen.ctmh.com/ctmh/what-we-do/be-a-consultant.aspx
and/or call me with all of your questions about Convention and Consulting!
Lastly, these are the cards we're making
at the next Card Class
Saturday, April 18th
(2pm-5pm) or (6pm-9pm)
at Jen's house (in Barstow Heights)
Let me show you how to create 8 hand-made greeting cards
every month (2 each of 4 designs) for $12 (in-person only)
(that's only $1.50 per card!)…
every month (2 each of 4 designs) for $12 (in-person only)
(that's only $1.50 per card!)…
OR get your class for just $5 (in-person only)
with any $24.95 or more product purchase!
This month our cards feature the
BLOSSOM paper pack!
BLOSSOM paper pack!
Space/supplies are limited to just 8 guests
this time, so please contact me to RSVP ASAP!!
Friday, July 18, 2014
Convention Highlights #2 (the Videos!)
Here is the official highlight video made by CTMH corporate (above).
You can see me and a few of my team members (all wearing pink)
at the start of the video...just 15 seconds in! :)
...and here is my team member, Denise Quinlan (below), participating in the Flash Mob!
Please use this first link to view it on Facebook (it's the better video!)
https://www.facebook.com/photo.php?v=10204261364920367&l=4086245214905334010
Isn't Denise the cutest?!! (and yes, that's me that you can hear screaming in the
background, lol). SO MUCH FUN!!
Finally, if you'd like to see another video of the Flash Mob shared by its organizer
(Consultant Tresa Black) and learn more about what it took to pull this off,
please check out more details on her blog linked here:
http://www.fabulouslyartsy.com/2014/07/happy-flash-mob-at-convention.html
Tuesday, July 15, 2014
Convention Highlights #1 (the "People" pictures first)!
My team, the Friends Forever Stampers!
except we were missing Paula :(
at the close of team meeting night.
My upline, Denise Anderson-Turley, and me
at the close of team meeting night.
Day 1 - At the start of opening general session!
Day 1 - Me at the start of opening general session
As a member of the "Heart's Delight" team, my sidelines and I
got special "reserved" seating up front for winning the "Team Up!" contest.
Day 1 - First creative session!
Day 1 - one of the cards (sneak peek!) that we made using the
NEW Artfully Sent Cricut Cartridge!
Day 1 - I displayed some of my artwork at the
Consultant Creativity Showcase that evening.
Day 2 - Up early and ready for the 2nd general session
with team member Cheryl McKinney.
Day 2 - Team members Sandy Robb and Cindy Franey
at the start of our afternoon business classes.
Day 2 - Team member Paula Cameranesi and I taking a break
during our afternoon business classes.
Day 2 - Awards banquet and dinner with my sidelines,
"Heart's Delight" team members, Jolene, Sharon, and Addie.
Day 2 - Monica Wihongi with some my team members
at the start of the awards banquet and dinner.
Day 3 - My 3rd upline, Sheri Rottler, sharing so many ways
to use the new "Picture My Life" kits during new product extravaganza!
(yes, those are some of the NEW PML kits behind her!)
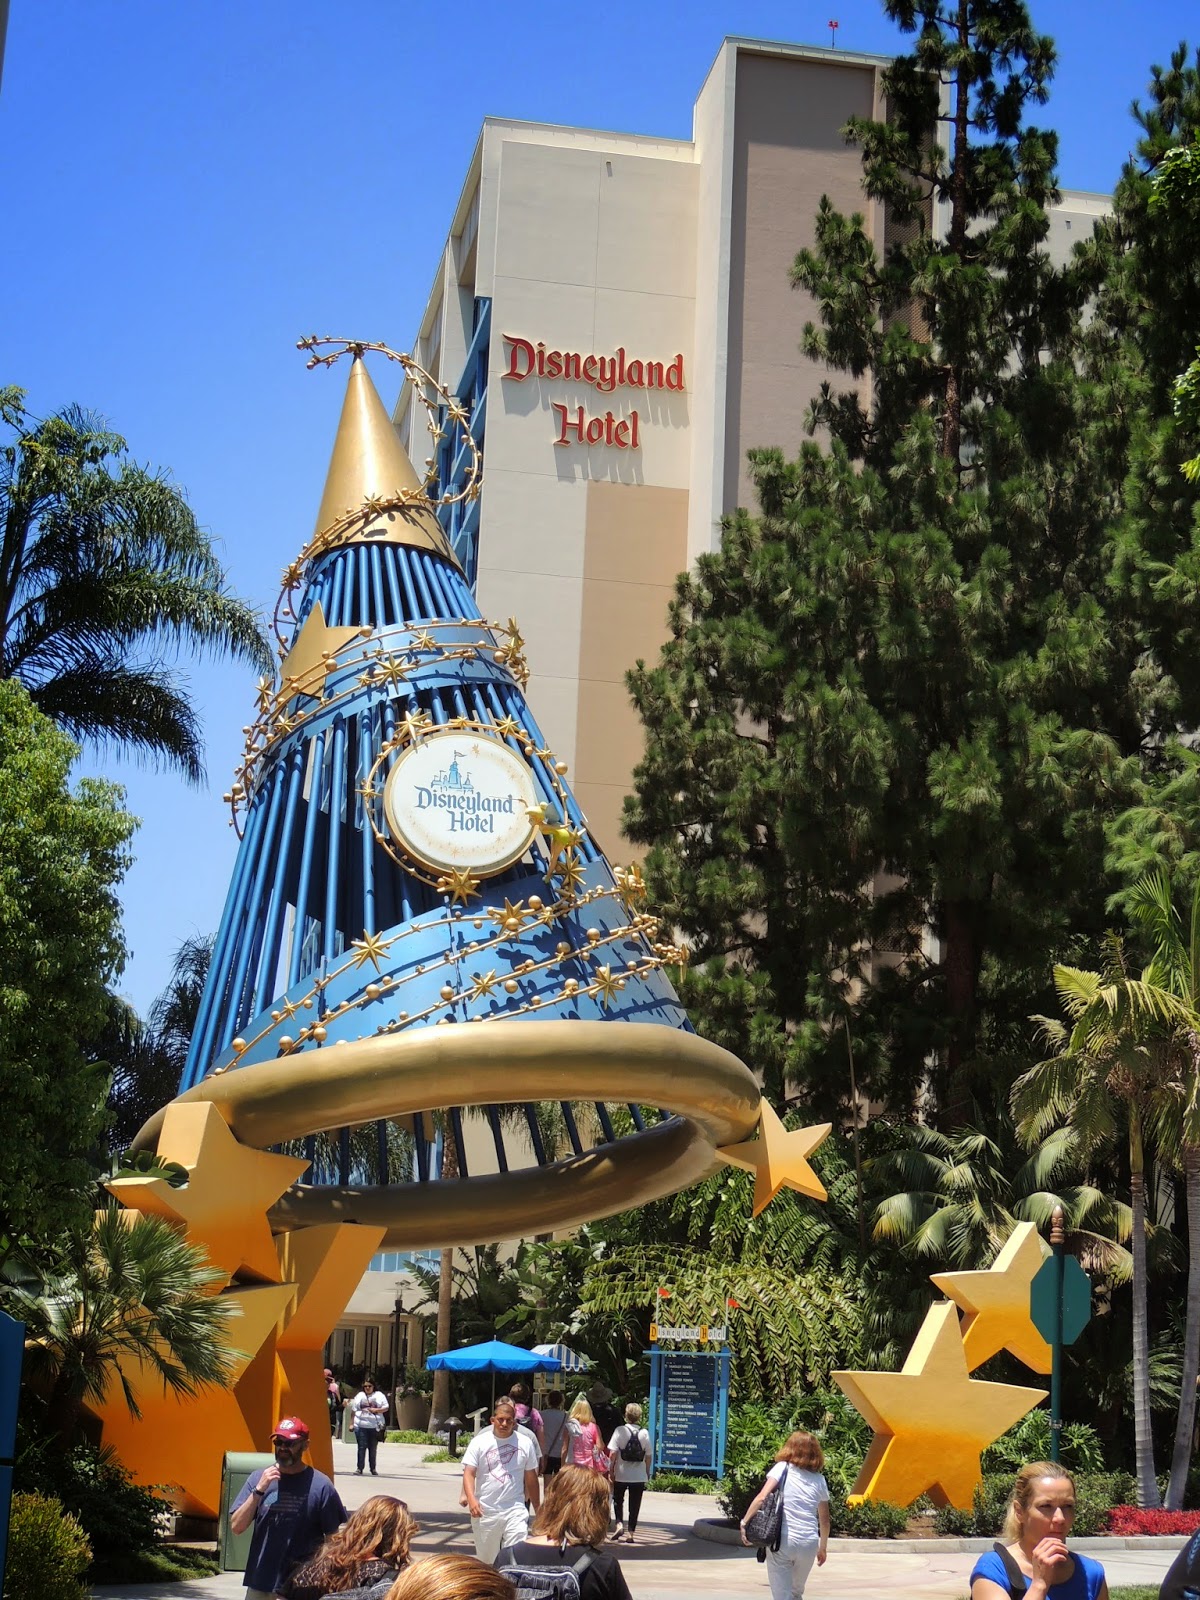
Day 3 - My view of the Disneyland Hotel as I was walking
back from Downtown Disney on my lunch break.
Day 3 - Afternoon creative session.
Day 3 - Me at the afternoon creative session.
Day 3 - Waiting and anxious to be let in to the evening closing session!
Day 3 - Team member Denise Quinlan found a Sticky Boy
during the evening closing session!
Day 3 - Team members Paula, Denise, and Patty Beck
during the evening closing session.
Dontcha just love how "reserved" Patty is acting for us?! lol.
Day 3 - Dinner...(and my team got to eat with
the Executive Board...Brian, Christine, and Monica...as part of our
reward for winning the Team Up! contest)...so fantastic!!
Day 3 - Dessert!
Day 3 - Team Up! contest winners...
The Heart's Delight team with our delightful leader,
Denise Anderson-Turley!
Day 3 - One last stop to take a selfie in the bathroom mirror
before my trip home. As a Team Up! contest winner, I also went home
with a gift bag full of CTMH product valued at $100! :)
Farewell beautiful Disneyland Hotel!
I'll look forward to seeing you again next year...
at Convention 2015!!
Want to see a few more Convention highlight photos?
Check out this link to Jeanette Lynton's blog:
http://www.jeanettelynton.com/2014/07/the-artistic-adventure-lives-on.html
Want to see a few more Convention highlight photos?
Check out this link to Jeanette Lynton's blog:
http://www.jeanettelynton.com/2014/07/the-artistic-adventure-lives-on.html
Subscribe to:
Posts (Atom)