Showing posts with label Valentine's Day. Show all posts

Saturday, January 18, 2014

Cricut Class this Friday 1/24!


You've asked for it...so it's here!! My first ever CRICUT CLASS! Many of you have been wanting additional help learning how to best utilize your Cricut machine,
so I'm here to show you how!

Join us to create this little Treat Bag (filled with goodies!) just in time for your Valentine's Day gift-giving...OR these are also versatile enough that
you can give them for ANY occasion really!

Each class attendee will make their choice of 1, 2, 3, or 4 Treat Bags for just $2 each (limit 4 per person this time). IF there are extras left over, then I will allow you to make/purchase more that evening only while supplies last.

You will get everything you see pictured here (above) including the treats inside...and go home with adorable finished gifts! I'm even providing the adhesive for you to use!

Please RSVP asap...as space is very limited!
(and please let me know how many you plan to make
so I can determine when the class is full)

**PLEASE BRING a straight-edge ruler, a Quilling tool (if you have one), and a Bone Folder (if you have one). I'll have a few extras to be used/shared by anyone who doesn't yet own these items (and if you don't know what some of these things are, then you'll be learning why you need them and how to use them!

Thursday, February 14, 2013

A Box For My Valentine!!

 Wishing you all a very Happy Valentine's Day!

Today I'm sharing this little box I made for my husband Jose for Valentine's Day (below).  The heavy-duty chipboard box with magnetic closure is our My Creations Card Box Z1647 ($4.95). I used the "For Always" paper pack with My Stickease (left-over from scrapbook pages I made recently) and embellished it with Slate Mini-Medley Accents Z1787 ($5.95) and Silver Shimmer Trim Z1799 ($4.95).

This creation also fits the "Love is in the Air" Challenge over at the Heart2Heart Challenge Blog this week! You'll definitely want to visit the Heart2Heart Blog soon to see more "Love-inspired" artwork!!

Here's a side-view of the box (below).
 
Finally, here's what I put inside. Jose will need to hide his box good to keep his "secret stash" hidden away from me and all the kids. With five kids at home, you can bet that sweets of any kind (especially the chocolate kind!) get devoured quickly and won't last very long around here.


Wednesday, December 12, 2012

"Whooo's Your Valentine?" Blog Hop!!

Thank you for stopping by to enjoy our Blog Hop featuring
our newest kit just released to help us celebrate
National Paper-crafting Month in January...
Whooo's Your Valentine?!!
 
If you've just arrived here from Heather's blog then you are on the correct path.
  
While this kit makes fun little Valentine's gifts when used as shown (3rd image below), I thought it would be fun to show you how you can change it up just a little and use it to create Christmas-y treats to give this holiday season as well!  I simply stuffed the tube with peppermint candies and used a little Colonial White and Olive Green cardstock that I already had on hand (ink colors I used are Black, Cranberry, Olive, and Saddle).  I cut the Christmas Tree from Colonial White cardstock (AP cartridge at 3") and the Holly Leaves from Olive cardstock (AP cartridge at 1.75").  3-D foam mounting tape gives many of my elements some dimension and I topped it off with a little bit of Burlap Ribbon and Red Sparkles (adhesive gems).

My husband Jose and I will be celebrating our 18th wedding anniversary on December 17th, so I thought this would be a nice little gift for me to give him along with a few other things, next week.

Front view (below) 

Top view (below)

This darling kit, which retails for $40, can be yours for only $10 when you spend $35 or more on any Close To My Heart products from the Autumn/Winter 2012 Idea Book between December 13th and January 31, 2013.  You’ll receive 12 die-cut boxes, 3 cardstock sheets, 1 sheet of silver glitter paper, 12 treat tubes, and an exclusive D-size stamp set created specifically for the kit.  This kit offers you a sneak peek at two NEW Spring/Summer 2013 products: the treat tubes and the silver glitter paper!  Decorate the die-cut boxes with the stamp images, cardstock, and glitter paper. Then attach the clear tube and fill with treats for valentines in a cinch!
 
Here are some examples of what you might create with your kit:
 
Here are the images that come in the stamp set that is included:

 
Now you can continue on with our Blog Hop to be inspired by more creativity using this kit and/or stamp set by visiting Fancy Melissa's blog next! Enjoy!!

Saturday, February 12, 2011

Valentine's Day Countdown - Day 12

Today I'm sharing a paper triangle box that I learned how to create at my 3rd upline Cindy Baker's consultant team meeting last year (here is a link to Cindy's Blog - I so admire her artistic talent)! At that same team meeting we also learned how to create all kinds of trendy paper flowers like the paper roses that adorn this box. Here's a link to one of my favorite paper flower online tutorials on my fellow CTMH consultant Jennifer Bennett's blog that shows you so well how to create the paper roses. I was a little lazier than Jen though and just kept it quick and simple by using Tulip cardstock (no sprayed ink or sponging) and also didn't crumple up the paper much either for my roses shown here. I've been wanting to post this fun triangle box here on my blog for some time now, so I think it's about time, right?! This box could be filled with Hershey's kisses (or any treat you'd like) to be given for Valentine's Day (or for any gift-giving occasion really).
To create the triangle box you will need one piece of cardstock cut to 5"x 12" and a piece of background & texture paper cut to 4.75" x 11.75". Adhere those two pieces together, centering the b&t which will leave you with a 1/8th" border of cardstock framing the outside edge. Then use your scoring blade/tool to make a crease in the center of the longest edge (at the 6" mark). Use a pencil to mark the mid-points (2.5 inches in) on both of the short ends. Then use your scoring blade/tool again to score a line from your corners at the 6" scored line to the 2.5" mid-point marks you made on each end. I've sponged the edges of my creased lines (above) with chocolate ink to help them be more visible so you can see all the lines that are scored (this also adds dimension and beauty to the finished box as well I think). Crease all your folds into a pie-shaped wedge and punch a hole on the open end where all the paper edges meet (you can see on my sample above that this results in 4 holes as the punch will go through 4 different parts of the paper). I like to use my crop-a-dile tool to easily punch through so many layers at once - it's actually 8 layers of paper when you count the b&t paper). Then simply thread a ribbon through the holes and tie a bow to hold your box closed.
Isn't this a simply great box pattern?!!!
I just love it - THANK YOU Cindy Baker for teaching it to me!


Friday, February 11, 2011

Valentine's Day Countdown - Day 11

For day 11 of the Valentine's Day Countdown blog hop, I'm sharing this cute little Ghirardelli Chocolate holder/pocket card. This pocket card features the Sophia X7131B papers with Bunny Love B1324 and In the month of February C1403 stamps. I'll be back again soon to share all the cutting dimensions with you!

Thursday, February 10, 2011

Valentine's Day Countdown - Day 10

Today I'm sharing another simple and sweet idea for Valentine's Day. This is an altered nugget tin. You can purchase these tins for just a little over a dollar each, online from specialtybottle.com (the tin's id code is THN8 in case that helps you find it). I simply wrapped 12 chocolate nuggets with strips of 1" x 3" background and texture paper from the Sophia kit X7131B and placed them inside the tin. I also created a little sleeve and tag (using a few punches including our NEW 2" scallop circle punch!) that slides over the tin to hold it closed and make for a nice presentation. These tins can be used to make such easy and affordable little gifts - and who doesn't just LOVE getting chocolate for Valentine's Day or ANY day of the year?!!!


Wednesday, February 9, 2011

Valentine's Day Countdown - Day 9

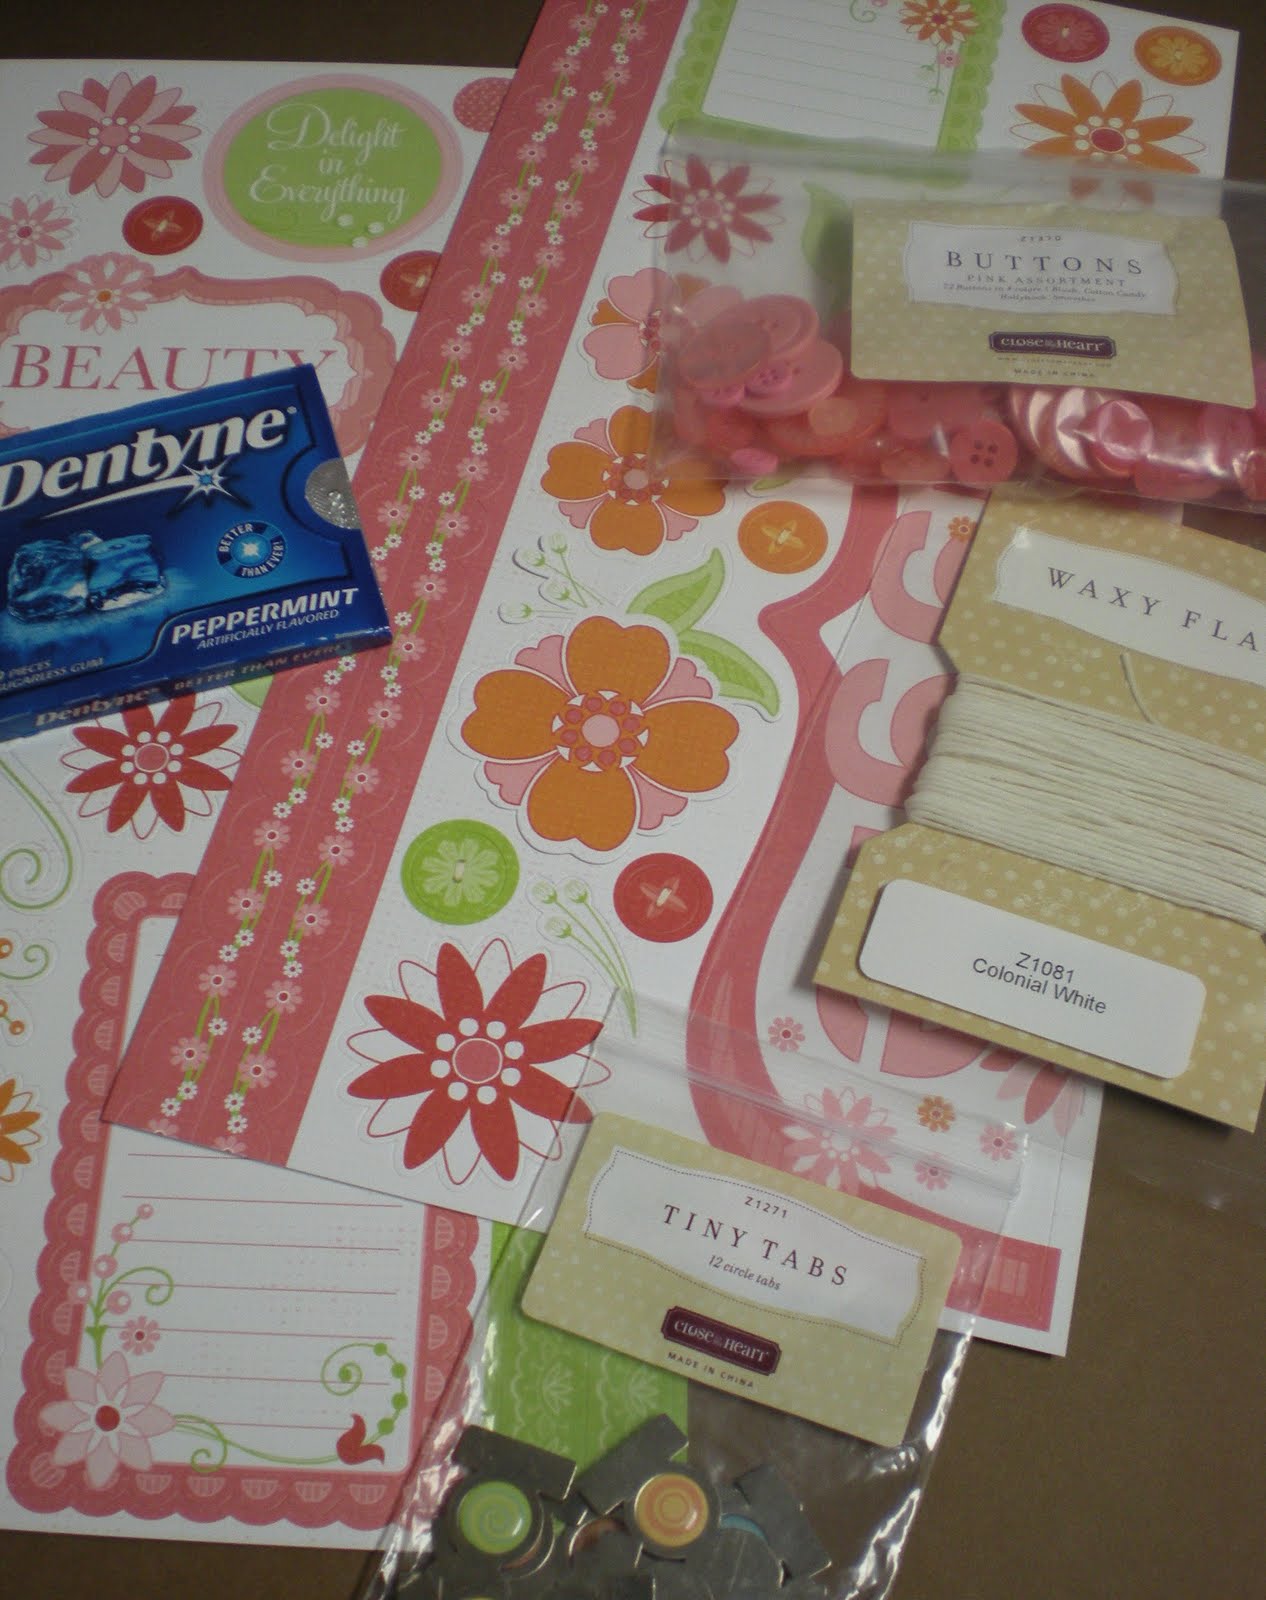
I'm sorry I haven't been able to post any new ideas for the Valentine's Day Countdown blog hop these past three days! Between helping my kids finish up their science fair projects that are due this week and being sick (again!), I've been struggling to squeeze in any creative time over the past few days. I am thrilled to be back to posting again today though, and I hope you will enjoy this very easy but super cool idea! It's so simple, just cover a pack of gum (with matchbox-style packaging - the kind that slides out from a sleeve) with your favorite background and texture paper and embellish! You could use stamping, but for this particular design I used only paper and My Stickease (adhesive die-cut stickers) from the NEW Sophia My Reflections kit X7131B and X7131C.
Before and After pics (above)
Here's a photo of all the supplies I used to dress-up my sweet little gift (above). For now, you can still purchase the recently retired "Tiny Tabs" I used, online here from my myctmh website for just $2 a pack (49% off) during our special "while supplies last" clearance sale! I ordered a few extra packs of Tiny Tabs last week, so if you live locally and are in need of some really quick (since V-day is less than a week away) feel free to let me know and I can get some to you for your own creating fast! I found that our local dollar store has this type of gum available in packs of 4 for just $1 each, so these could easily make for some affordable little Valentine's Day gifts the kids could give out to their friends and/or teacher's at school. It's also a great way to use up left-over My Stickease and paper scraps while making each and every one you create unique! I will be back again tomorrow to share another creative idea for Valentine's Day, so I hope you will come back and visit my blog again soon as we continue on with the countdown!


Thursday, February 3, 2011

Valentine's Day Countdown - Day 3

Welcome to day 3 of our Valentine's Day Countdown blog hop! When I saw these adorable little "M&M stix" on fellow consultant Angela Tutton's Blog last September, I just knew I had to make these for Valentine's Day! THANK YOU Angela for sharing such a fantastic tutorial on how to make these. I have been so inspired by you and I hope you like my creations for Valentine's Day. These are just two of the items I'll be making with my local creative friends this Saturday, February 5th (join us at 6pm or 7pm) at my $5 Creative Class! I still have room for a few more guests, so please contact me to RSVP soon before it fills up!
Close-up (above) of the tag that uses Bee Happy B1374, In the month of February C1403, and Affection C1441 stamp sets with Black, Tulip, Cotton Candy, Garden Green, and Honey inks/markers.
Close-up (above) of the tag that uses In the month of February C1403 and Affection C1441 stamp sets with Black and Cotton Candy inks.


Monday, January 31, 2011

"Friendship" SOTM Blog Hop and Valentine's Day Countdown - Day 1!

Welcome to our February Stamp of the Month blog hop featuring this month's new SOTM - Friendship D1453! If you've just joined me from Tammy's blog then you are on the right path! This blog post is also my first post for Day 1 of the Valentine's Day Countdown blog hop that I am participating in for the next 14 days also! Please continue to come back and visit my blog each day for the next two weeks as I will be sharing a new creative idea for Valentine's Day each and every afternoon!
I created this 6x6 Valentine card using the February Stamp of the Month (Friendship D1453) and our new Sweetheart papers X7134B. My card design is inspired by Originals - The Main Idea (p. 96). The heart shape I used is the largest heart from our Hearts Dimensional Elements chipboard shapes (Z1278 $3.25). I simply adhered the heart shape to the front side of the Sweetheart flower B&T paper (so the back side of pink b&t paper would show on the front of the heart) and then used my micro-tip scissors to cut off the excess paper until I had a nice heart shape of paper covering the Dimensional Element. I then used a sponge dauber and black ink to ink distress the edges all around the heart. Then I used the "embossing resist" technique to create the flourish design that covers the heart. To do this, I simply stamped the image on the heart with our clear Versamark ink (Z891 $9.95) and then heat embossed it with our clear detail embossing powder (Z821 $3.95). Then I used a sponge dauber (Z726 $3.95) with Tulip ink to rub the ink over and around the embossed image in a light circular motion. The clear embossing resists the ink, yet allows the color to show all around the image. I recommend using a tissue to then wipe the embossed area and remove the excess ink that beads up on top of the shiney embossed area. Because the embossing powder I used is clear, you can see the beautiful patterned paper images underneath it - so cool!
Please come back tomorrow and every day for the next two weeks to see more of my creations for the Valentine's Day Countdown blog hop (as well as more ideas using the February Stamp of the Month)! Now you can continue on the SOTM blog hop by visiting Melinda's blog next! Enjoy!!

Sunday, February 14, 2010

Happy Valentine's Day!!


These are the easy little Valentine's Day goodies I made with my consultant team at our team meeting in January and my customers also created these items with me at my First Friday Creative Class earlier this month. I hope you enjoy seeing them here and I'm even including my instructions for you also in case you'd like to try making something similar yourself some time!

Treat Bag Topper Instructions
(stuff the clear bag with any fun treats you’d like!)
The clear bag we’re using is intended to hold a 3x6 card and comes from clearbags.com (B3X6S - $5 for 100). The cardstock used to make the topper measures 3.5” x 7 inches (before it is folded in half). I really like this size of bag and topper simply because you can use any 3x3 card design from Originals or Wishes to inspire your creativity, and then your 3x3 design can be centered and attached to the topper base (fits perfectly!) You can use brads, eyelets, staples, punched holes tied with ribbon, or hand-stitching to hold your topper on to the top of the bag. Just remember there’s no need to waste a lot of adhesive on it as you don’t want it to be too difficult for the receiver to open (yes, as cute as it is, it is likely be opened – especially if given to a child – lol).

Here is a list of the item numbers for the different sizes of clear bags I prefer to use (from http://www.clearbags.com/) for all the different sizes of cards I like to make. You can use any of these sizes of bags to make treat bags with toppers, you will just need to measure them and cut your cardstock for the topper just slightly wider than the width of the bag.
6 x 6 card or scrapbook page (B66 – $6 for 100)
5 x 7 card (B75 - $4.90 for 100)
8 x 3.5 card (B83- $6 for 100)
4¼ x 5½ standard size card (B45 - $5 for 100)
3 x 6 card (B3X6S - $5 for 100)
4½“ circle or square card (B44XL - $5 for 100)
3 x 3 card (B33 - $4 for 100)
2½ x 3½ card (B2X4 - $3.50 for 100)
4¾ x 3 card (B3 - $4 for 100)

Lollipop/Sucker Covers
You can see some amazingly beautiful covers created by Jeanette Lynton on her blog (http://www.jeanettelynton.com/)!! She shared them last year on February 6th, 2009, so you will need to click on the “previous posts” link on the left to find them, but her lollipop covers are spectacular so I hope you will check them out!
These instructions come directly from Jeanette Lynton herself:
1). Each “lollipop caddy” measures 2 ½” x 2 ½” finished.
2). For each caddy cut a cardstock piece 2 ½” x 5 ¼.”
3). Score the middle of each cardstock two times. Measure 2 ½” from each end. This creates ¼” gusset at the top of your caddy for the thickness of your lollipop.
4). Then, decorate the two sides of the caddy any way you wish. Remember to add “to” and “from” on the back.
5). Punch two holes, one on either side of the lollipop and string with ribbon.
6). Slide the lollipop inside the caddy, and then secure the caddy closed by tying the ribbon in a bow or knot—and presto! You have an adorable, unique, fast valentine that says, “You’re Sweet” in more ways than one.

Altered Embellishment Tubes
Dress up your left-over empty clear tubes that come with the Ribbon Rounds, Photo Hangers, and Hinges from CTMH!
(You can also find tubes of mini M&M’s or other candies at the store that you could decorate in a similar way as well).
Stuff a clean tube with chocolates or any treat you wish to use. Adhere two or more layers of B&T duos together to wrap around your clear tube. For our project (using the You Rock papers) the outside layer (outdoor denim dots B&T) measures 2.25” by 6 inches. The middle layer (smokey plum star B&T) measures 1.75” by 6 inches. This will allow you a little extra paper on the 6” end to overlap a little as you wrap it around the tube and adhere it near the center of the tube. Then wrap a piece of grosgrain ribbon around the middle and tie a knot. For our project we will stamp a star and the sentiment “for you” and then cut it out and attach it to the knot with a safety pin. The B&T paper used to cover the top (lid) is a 1.5” circle that can be cut with a circle cutter or punch (I still like to use my discontinued Coluzzle). Then add a crocheted flower with a brad in the center using a glue dot to top it off! The many possibilities for ways to do this project are endless!