Showing posts with label Trends-Flourishes. Show all posts

Wednesday, July 30, 2014

Card Class on Saturday 8/2 at 6pm!

Let me show you how to create
8 hand-made greeting cards
(2 each of 4 designs!) on the
first Saturday evening of
every month for $12
(that's only $1.50 per card!)
...OR
Get your Card Class for just $5
with any $24.95 or more
product purchase!
This month's cards will
feature the brand new
CHALK IT UP paper pack!

Space is limited to 12 students, so
please RSVP ASAP to ensure your spot.
I still have room for a few more,
so it's not too late to plan to join us!


Wednesday, August 22, 2012

My Avonlea Workshop projects for 8/25!

I've been busy doing my final preparations for our
Avonlea Workshop that is coming up
this Saturday 8/25 (1pm to 5pm)! 
I am expecting 10-11 participants to attend and I am so excited about that!! I wanted to share all of my projects with you here finally so you can see exactly what we're making!
Can you believe that we are making
all of this for just $25?!! 
(or $35 if the attendee wanted the exclusive coordinating c-size stamp set to keep).
 
I do have just TWO extra kits left, so if anyone else would still like to plan to join us at the last minute...please let me know now so I can save a kit for you before they are gone!
(full kits are $25 or you can make the "cards only" for $15 - 4 each of 3 designs)
  
 Layout #1
 Photo sizes are:
(2) - 4x6" tall and (6) - 2x2"
(If you don't have photos as small as 2x2" consider using
wallet-sized that you can crop down, OR we can make
two 4x6" wide photos fit in the 2x2 spaces instead if you prefer).
  
 Layout #1 (left side)
 
 Layout #1 (right side)
 
 Layout #2
 Photo sizes are:
(1) - 5x7" tall, (1) - 5x7" wide, (1) - 4x6" wide 
(or two 4x6's that you can crop down to 3x4 or 3.5x4
as I have done on my layout shown above), 
and (1) photo cropped to 4x4"
  
 Layout #2 (left side)
 
 Layout #2 (right side)
 
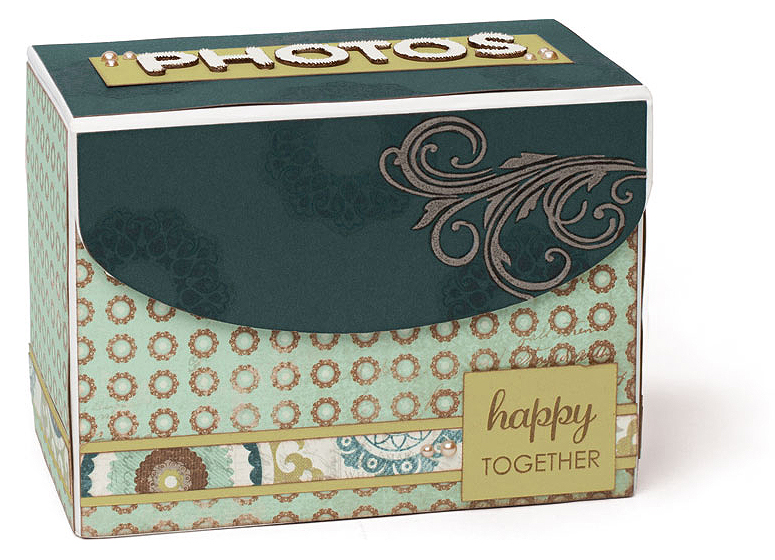
 My photo/card/recipe Box
 
 Card #1
 
 Card #2
 
Card #3
 
Here is the list of things attendees will want to
remember to bring:

Potluck appetizer, snack, or dessert to share
(keeping it small and simple is fine!)
Adhesive
 (tape runner dispenser and refills - I have plenty for you to buy as needed)
Glue Dots (if you have them)
12' Paper Trimmer (if you have one)
Micro-Tip Scissors
 (or ANY scissors you have, the smaller the tips the better)
Piercing tool kit
VersaMat (if you have one)
Chocolate ink pad
Olive ink pad
Smokey Plum ink pad
E1024 Keepsake Alphabet stamps (if you have)
Avonlea WOTG kit (only if you are a new consultant who already has one!)

I don't expect you to have everything on this list,
just bring whatever you can!!
 I will have all of these items here on hand for you to use/share also!

I am so looking forward to all the
creative fun, friends, food, and prize give-aways!!

Wednesday, August 1, 2012

Free Cricut Class 8/3...Avonlea Workshop 8/25...and the NEW Idea Book!!

There's A LOT going on in August and I am excited to share it all here in one post!

First, you are invited to my 
FREE Cricut Class
Friday, August 3rd (6:30pm to 8:30pm)
Join us and I will show you how to create this 
cute little gift bag using our NEW Cricut Artiste cartridge!!
(I'll also give you your FREE copy of the brand-new Idea Book when you attend!)
If this date doesn't work for you, please let me know because I may offer another 
FREE Cricut Class opportunity on Friday, August 10th...IF there is enough interest!
PLEASE RSVP asap to reserve your space now!
 
This 3.75" x 5.25" tall gift bag is made with our new 

Here is a close-up of the bow that embellishes the top of the bag 
made with our new bulk Burlap Ribbon Z1760.

***************************************
Next, you are invited to my
Avonlea WORKSHOP
Saturday, August 25th (1pm to 5pm)
Pre-order your kit by 8/15 to reserve your spot now!
This will be the first of my NEW and improved workshops this season,
and I am so thrilled to be able to tell you that my workshops will now include
more food, more prize giveaways,
and more time for creative fun!!

THREE different kit options to choose from:

$35 kit includes 
everything you need to make
TWO layouts (4-12"x12" pages),
and SIX cards (2 each of 3 designs),
PLUS an exclusive C-size stamp set for you to keep!
 (kit is shown on page 21 of the NEW Idea Book)

$25 kit includes
everything you need to make
TWO layouts (4-12"x12" pages),
and SIX cards (2 each of 3 designs),
and the use of my stamp sets.
 
$15 (Cards Only) kit includes
everything you need to make
TWELVE cards (4 each of 3 designs),
and the use of my stamp sets.
 
ADD the Bonus Project
(Recipe/Photo/Card Box)
shown below
 to any kit for just $7 more!
 
Layout #1 (above)
CLICK ON THE IMAGE to see it larger!

Layout #2 (above)
CLICK ON THE IMAGE to see it larger!


The SIX cards - 2 each of 3 designs (above)
$15 (cards only) kits will include enough supplies to create
double of what you see here (for a total of 12 cards)!
You get to choose the sentiments you want to stamp on them, 
so you can customize these cards to meet your needs!
 
This is the exclusive C-size stamp set you get to keep with the $35 kit!
($25 and $15 kits include the use of my stamp sets)
 
You also have the option to ADD this BONUS PROJECT 
Recipe/Photo/Card Box to any kit for just $7 more!!
 
I am also excited to announce that...
I will be giving away some great prizes
at all of my upcoming monthly workshops!
The more guests that pre-order kits, 
the more FREE hostess rewards credit I will have to spend and thus...
the more FREE products I will be able to give away to you!

Earn your tickets to win prizes by doing the following:
Pre-pay for your Avonlea kit by 8/15 = 1 ticket
Attend on 8/25 = 1 ticket
Arrive on time (1pm) = 1 ticket
Bring a potluck main-dish/appetizer/dessert to share = 2 tickets
For every layout you complete = 1 ticket
For every complete layout that includes your photos! = 1 more ticket
 For every 6 cards you complete = 1 ticket
Pre-pay for the next month's kit at the workshop on 8/25 = 2 tickets
Bring a NEW friend you've invited (pre-paid) = 3 tickets!*
 
*I will allow you to share/split your kit with a friend as long as space allows!
Some mom's and grandma's like to share with a teen daughter/son and that is just fine...
so friends are always welcome to come and share with you
(but you will have to determine how you split/share the tickets you earn together)
and you don't get the 3 extra tickets for bringing a friend
unless they have pre-ordered their own kit!
**If something comes up and you have to miss the scheduled workshop date,
I am able to schedule a make-up date with you to come on over and work on it!
***************************************
  
and finally...
The NEW IDEA BOOK IS HERE!!
(and free to view online now!)
You can browse through it and order the new products online from my website now:
You can get your FREE copy from me when you attend 
any of my upcoming events or feel free to contact me to
request one (I do deliver locally and can mail one to you also)!
I do charge a $5 shipping charge to mail an Idea Book to you,
but this price includes a coupon for $5 off your next order of $25 or more,
(so it is still FREE when you place an order with me!)


Tuesday, July 31, 2012

August SOTM (Baroque Borders) Blog Hop!!

Thank you for stopping by to enjoy our August Stamp of the Month Blog Hop featuring this month's SOTM - Baroque Borders S1208! If you've just arrived here from  
Annette's Blog then you are on the correct path.
 
(remember, you can click on my images to see them up close!)
 I've created this standard-size card featuring two of the elegant images from this set along with our NEW Avonlea paper pack X7155B that is available to order from the NEW Autumn/Winter Idea Book and Catalog starting on August 1st!

I used an Olive ink pad to stamp the SOTM images onto a background of Avonlea Green cardstock. I also used Chocolate ink with a sponge dauber to ink distress the edges as well as to stamp my sentiment (sentiment stamp comes from the Workshops on the Go Avonlea Cardmaking Kit G1041 shown on page 22 of the new Idea Book). My card design was inspired by our NEW Make It From Your Heart - Volume 1 - Pattern 20 (page 42). This new how-to publication is full of creative ideas to inspire you for only $7.95!!
(shown on page 11 of the new Idea Book).

Here is some more beautiful artwork created by the CTMH art department using this same stamp set with the Avonlea papers (as well as a view of
all of the images included in this lovely stamp set):

 You can purchase this stamp set from me now for $17.95 (full retail price) 
or at the discounted price of just $5 with any order of $50 or more!!
(from August 1-31, 2012 only)!
Now you can continue on with our Blog Hop 
and be inspired by more creativity with this stamp set
by visiting Michelle's Blog next!
Enjoy!!

Wednesday, February 29, 2012

March SOTM Blog Hop!

Thank you for stopping by to enjoy our March Stamp of the Month Blog Hop featuring this month's SOTM - Potential S1203! If you've arrived here from  
Mary's Blog then you are on the correct path.
The 6x6 card I've created this week is inspired by Originals - The Main Idea (p. 96). I've used paper from the Cruisin' paper pack Z7154B and a color combo that includes Black, Juniper, Twilight, and White Daisy. On the right side of the card I've done some "tone-on-tone" stamping using Juniper ink on Juniper cardstock to create my stamped background. I also sanded a few of my elements with sand-paper to reveal some of the white core of my cardstock to achieve that "shabby" look. While I absolutely LOVE the huge variety of different flower shapes I am able to cut with my CTMH Art Philosophy cartridge, I think that these flowers are my most favorite ones to use right now -
as I so love those heart-shaped petals!
There are so many lovely images included in this Stamp of the Month set! I think it would be fair to say that it definitely has lots of "potential"!! (pun intended) "wink" ;) and I look forward to creating more with this stamp set, as I already know it will be one of those sets I will find myself using over and over again!
Now you can continue on with our Blog Hop to be inspired by more creativity with this stamp set by visiting Traci's Blog next! Enjoy!!

Tuesday, January 31, 2012

February SOTM Blog Hop!!

Welcome to our February Stamp of the Month Blog Hop featuring the February SOTM - Thoughtful Tidings S1202! If you have come here from Lori's blog then you are on the correct path.
Today I am sharing a simple standard size card featuring the Florentine Paper Packet X7153B (colors are Bamboo, Brown Bag, Cocoa, Colonial White, Creme Brulee, Garden Green, Goldrush, Olive, Twilight, and Vanilla Cream). To create the base of this card (shown at the top) I used the background stamp from the Florentine WOTG stamp set G1038 to stamp the background with Desert Sand ink on my Colonial White cardstock base. As usual, I used by AP Cricut Cartridge to cut many of the shapes on this card (Rctngle8 cut from Colonial White 1.5", Rctngle8 cut from Goldrush 1.75", Cupcake/Shift/Font from Goldrush at 2" to make the flower, and Petal1/Shift/FontLayer from Olive cardstock at 2"). Stamping and edge distressing was done with Cocoa ink (except for the paper Butterfly that was sponged with Desert Sand ink). I'm including a view of all of the images included in the SOTM set (below), as this set includes so many great sentiments that I will be sure to use over and over again! You can see (all the images outlined in red) that most of these sentiments coordinate well with our Art Philosophy Cricut Cartridge!
Thank you for stopping by! Now you can continue on the hop by visiting Brae's blog next! Enjoy!!

Tuesday, August 2, 2011

Consultant Team Swap Cards!! (from July 23rd meeting)

So I've just starting hosting a brand-new monthly swap for members of my consultant team! Our first "virtual" swap card was due to me in July, and I am happy that I am finally ready to post and share all of these beautiful creations! My card for this swap (above) is a standard size card (5.5" x 4.25"). The stamp sets I used include 3 different stamp sets - Happy Clusters C1471 (p. 93), Love Life D1482 (p. 29), and A Typeface (August promotion). Cardstock colors I used are Olive, Smokey Plum, and White Daisy. Ink colors used are Bamboo, Black, Desert Sand sponging, and Smokey Plum. I cut the star out using our NEW Cricut Art Phiilosophy cartridge!!! The catalog doesn't include a red line around this image on p. 93, so I wasn't sure if it would be compatible, but discovered that the "Star" image cut at 2-3/4" size worked perfectly!! I am thinking that A LOT more of our images will work with this cartridge than are shown in the Idea Book - you just have to experiment and try different things until you find the right size to cut them!!!

I'm including the swap guidelines that I gave to my team (below) so you can read the specific challenge I gave them for creating this time. I am hopeful that next month a lot more of my team members will be able to participate along with us! Now please ENJOY all of these fun, creative cards made by some of my wonderfully-talented team members and friends (the Friends Forever Stampers Team)!


(visit PaulainPS.blogspot.com for details)
Cardstock: Sunset, cocoa, desert sand, olive; Stamps: You & Me, August SOTM Wicked, Hodgepodge Alphabet; plus: mocha opaques, and chocolate buttons threaded with raffia. (no blog to link to yet).
(visit NikkaGeers.blogspot.com for details)
(visit GracefulCardmakers.blogspot.com for details)

Sunday, July 31, 2011

August SOTM Blog Hop (featuring "Wicked" and "A Typeface"!)

WELCOME to our August Stamp of the Month blog hop featuring this month's new SOTM - "Wicked" S1108! If you've just joined me from Shannon's blog, then you are on the right path!
First, I'm sharing a standard size card (above) that I created using a little bit of Smokey Plum B&T duos paper from our NEW Sonoma X7143B paper pack. Notice how I've used the "witches hat" image as the stem for my pumpkin! To make the stem I first stamped the image with Black ink on my 3"x3.75" piece of colonial white cardstock. Then I used the "paper piecing" technique to add the green stem by stamping the image again with Olive ink on a scrap of Colonial White cardstock, cutting out just part of the "hat" image, and then adhering that part over top of the first image I stamped with Black ink. To create the pumpkin, I cut out three 1.5" ovals from Sunset cardstock using the "Oval3" button with our NEW "Art Philosophy" Cricut Cartridge!! Then I stamped the honey-comb-like image with Sunset ink ("tone-on-tone" stamping) on each oval and sponged the outside edges with Desert Sand ink. Then I layered and adhered them together over the stem to create the pumpkin! I also used "masking" technique to stamp just the word "Halloween" on the 1"x2" piece of Colonial White cardstock. I added the word "Happy" using stamps from the "A Typeface" stamp set that is your FREE gift "this month only" when you purchase the "Wicked" Stamp of the Month for just $5 with any $50 order! (both stamp set images are shown at the bottom of this post and remember, you can click on any of my photos to see them larger).
Next, I'm sharing a "candy bar pocket" (above) that I created using the the "Tag5" plus "Card" buttons with our NEW "Art Philosophy" Cricut Cartridge (I just LOVE our new Cricut Cartridge and have been playing with it a lot this week)!! The card/pocket is cut from Olive cardstock at the 5.75" inch setting (this allows you to cut two from one sheet of 12x12" cardstock). Colors used here again are Black, Colonial White, Olive, Smokey Plum, and Sunset (the cat is stamped with "2nd generation" Black ink). The "Bling Assortment" Pin Z1466 and Pin Clips Z1612 that I've used on both projects are held in place by being stuck through the 3-d mounting tape I used underneath my card elements to give them some lift and dimension.
Finally, here is the card I created with my customers recently at my New Idea Book Reveal Party and Open House (above)! Don't you just LOVE that this stamp set can be used to create a lot more than just items for "Halloween"?!! I am looking forward to using the "honey-comb-like" image and the "flourishy border" stamp as well as some of the other sentiments on a variety of different projects. This card is also made with a few other brand-new products including the Love Life D1482 stamp set, Roxie paper pack X7140B, Just Blooms paper shapes butterflies Z1463, and Bling Assortment buttons Z1466!
I hope you've enjoyed seeing my artwork! Now you can continue on with the rest of this blog hop and see more creative ways to use this "Wicked" stamp set by visiting Haley's blog next! Enjoy!!

Monday, September 15, 2008

Humble Artists Swap Card (using my first "Color Me Challenged" color combo!)


I just mailed my swap cards last week for the "Humble Artists" swap group (due Sept 10th) that I participate in. The guidelines for this swap this time around were:

-We will create a 6x6 card.
-Please use at least a little bit of any one of the 5 new My Reflections paper packs in the new Idea Book!
-You must use something you can see through (clear buttons, vellum, transparency, organdy ribbon, liquid glass, etc...).
-You must use some element on the card that is round or curved (you know how popular circles and scallops still are).
-Please use any kind of dimensional element.
-Finally, include at least three different stamped images on your card (the images can be from the same stamp set or different sets).

For this card I also used colors from the first color challenge posted on the NEW "color me challenged" blog!! (http://colormechallenged.blogspot.com/). Colors are Vanilla Cream, Vineyard Berry, Juniper, Sorbet, and Desert Sand. If anyone wants to play along and create a card using any of the guidelines listed above I would welcome you to do so and share the link to it here in the comments section if you can!! One thing I really love about my humble artists swap is seeing how different everyone's cards turn out considering we're all using the same exact guidelines! Once I figure out how to post links to some of the other swap participants artwork on their blogs, I will do that here too, but for now I am still learning and haven't figured that out just yet. I'm just happy to finally be posting and using my blog - lol!!

Thursday, December 13, 2007

He's the Juan!


Well, I haven't kept up with adding to my blog at all like I had hoped to - LOL! That's the challenge of having so many kids and a new baby in the house though, I guess. I think I'll do better at keeping up with this once our daily routine gets a little more established and I don't feel so overwhelmed like I have been lately. Baby Juan Steven turned three months old just yesterday, December 12th, and it's amazing how quickly he is growing. I just love how chubby his soft little arms and legs are getting! He has an adorable smile and a giggle that will just melt your heart . He hasn't been sleeping as much as he used to at the beginning, so I find that he is awake and I am playing with him a lot during the day, and therefore can't get much else done around here (but who would want to? - he's just so much fun!)
I finally finished and mailed off all of my birth announcements and thank you cards last week! It was a project I had worked on very gradually (off and on for over a month) and I am just so thrilled to have finally finished them (even if he is three months old already now LOL!) I'm very proud of how they turned out, so I guess I'd better share them here with you as well. I hope you like our birth announcement as much as we do!

P.S. - If you click on the photo, you can see the details up close!